Blog migration: From VPS to Cloudflare pages
The current setup for my blog offers great flexibility and control, source and CI/CD is on GitLab, DNS is handled by Cloudflare and server is VPS in Hetzner Cloud (2 vcpu/4 GB ram/40 GB disk) using Linux Fedora 44 on aarch64, but probably is overkill just to run Nginx and serve static content.
Migration
I’m migrating my blog to another platform with 2 main goals and one constraint, first goal is to reduce mantainance operations like apply OS updates, security patches, check logs, configurations updates, remove old logs, second goald is reduce costs to minimum, the constraint avoid any vendor lock-in or any major change on the blog tooling, currently using Hugo site generator.
The current workflow is generate the content on my local, commit the changes, push to main branch, then the Gitlab pipeline takes care of the build and deployment (rsync to the server the content)
There were 2 options I consider
Both options offer zero cost on infrastructure, support for static content generators, no vendor lock-in risk, and fast deploy
I selected Cloudflare because if offer less amount of changes also my DNS is there.
The Plan and steps
- Check the current version of
hugoto use the same for the build in Cloudflare
hugo version
hugo v0.162.1+extended linux/amd64 BuildDate=2026-06-07T00:00:00+00:00 VendorInfo=Fedora:0.162.1-1.fc44
# 0.162.1+extended- Add the file
wrangler.tomlto the repository with the content
"$schema" = "./node_modules/wrangler/config-schema.json"
# worker name
name = "blog"

# Set this to today's date
compatibility_date = "2026-10-10"

[assets]
directory = "./public"
not_found_handling = "404-page"
html_handling = "auto-trailing-slash"- Connect GitLab to Cloudflare Pages
- Log in to your Cloudflare dashboard and go to Workers & Pages > Overview.
- Click Create application, then select the Pages tab, and click Connect to Git.
- Select GitLab as your provider. You will be redirected to GitLab to authorize the Cloudflare integration.
- Once authorized, select the repository containing your Hugo blog source code.
- Click Begin setup.
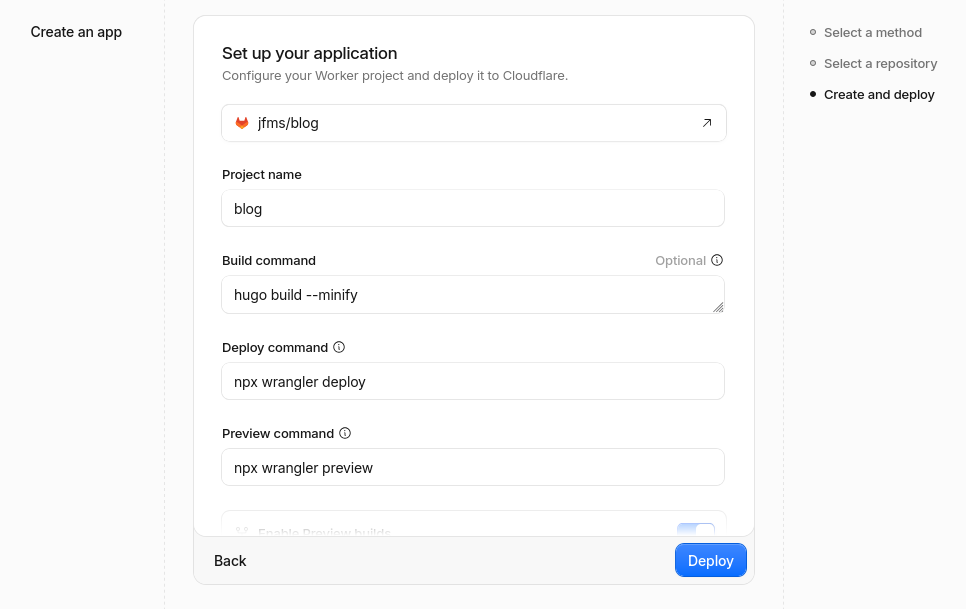
- Configure build settings
- Add build command
hugo build --minify
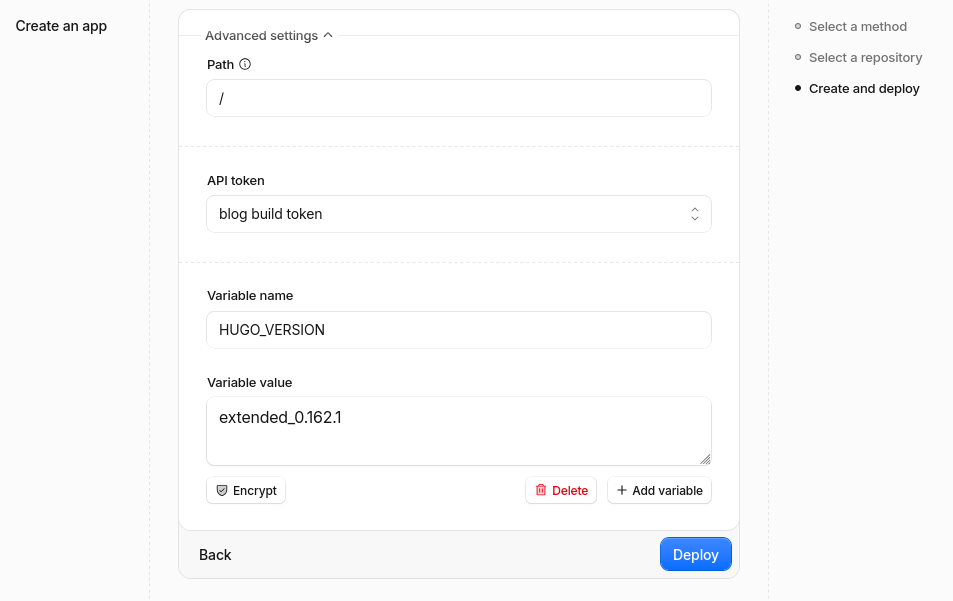
build settings - build command - Add Variable
HUGO_VERSIONwith the valueextended_0.162.1build settings vars
- Add build command
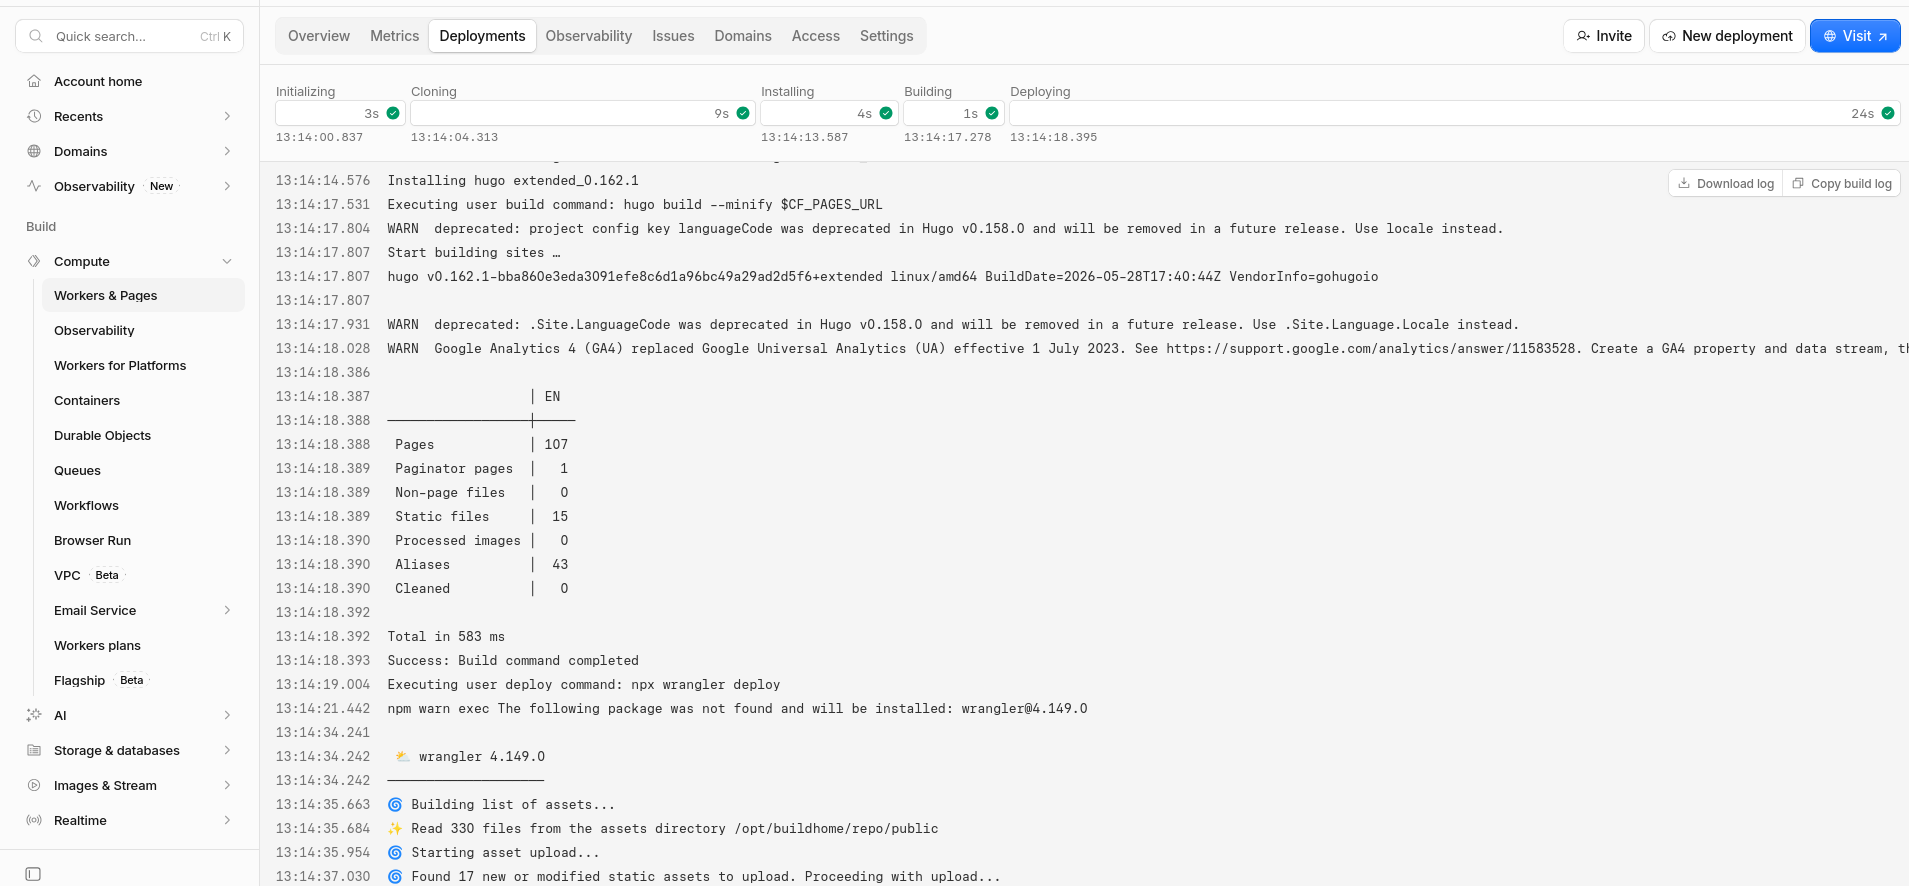
- Verify the build results and deployment
build output
Now if you are reading this, is now hosted in Cloudflare Pages.
References
https://developers.cloudflare.com/pages/framework-guides/deploy-a-hugo-site/